Importing DSM packages
Importing DSM packages
The Packaging PowerBench also allows the import of DSM packages and the conversion into a PowerShell script. Whereas in previous versions you first had to export a DSM package via DSM in order to be able to import it into the PPB, from version 4.0 the PPB now also allows direct "online import" from an accessible DSM environment. The prerequisite for this is that you have configured the DSM integration.
To import a DSM package in the PPB, proceed as follows:
Option 1 - Import of a previously exported DSM package:
- In the DSM console, export the DSM package to any temporary directory.
- If you have just opened the PPB, click "Import Package" on the start screen.

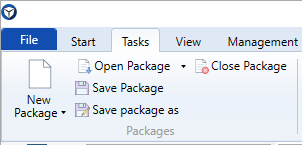
- Alternatively, select "Import Package" from the "File" menu or click the "Import Package" icon in the "Tasks" tab.
- The Package Import Wizard opens, where you now select the "Import DSM Package" option:
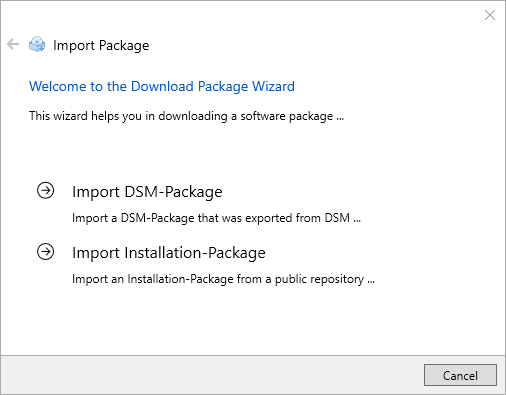
- The wizard for importing DSM packages is started:
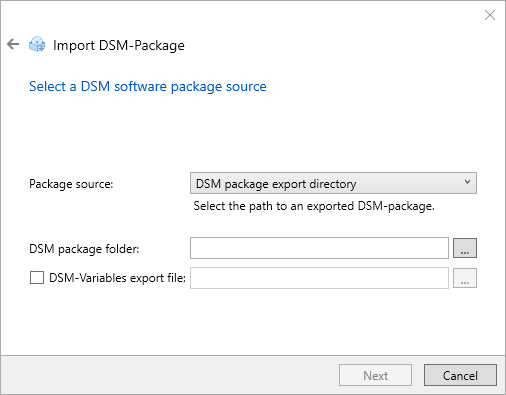
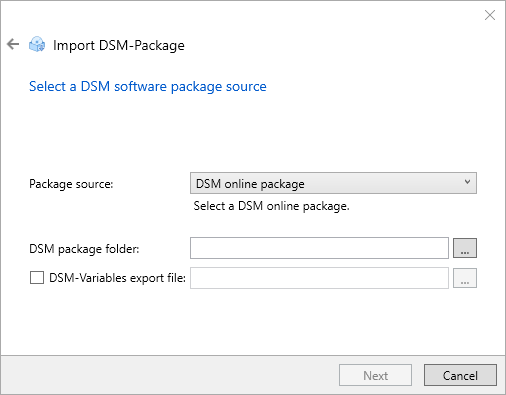
For "Package source", select the value "DSM package export directory" and for "DSM package folder", select the directory to which you exported the package from the DSMC. You can select either a "_ExpInfo.xml" or "Script.inc" file. If you have DSM integration activated, you can also import a DSM package from the "live environment" without having to export it to DSM first.
Optionally, you can specify the location of a DSM variable file. You create this file by selecting the "Tools > Show All Variables..." menu item in the DSMC Infrastructure view and then using the "Export..." button to save the variables known to DSM together with their current values in a CSV file. The dialog expects a standard export file with the naming scheme "_ExpList_AllVariables_*.csv".
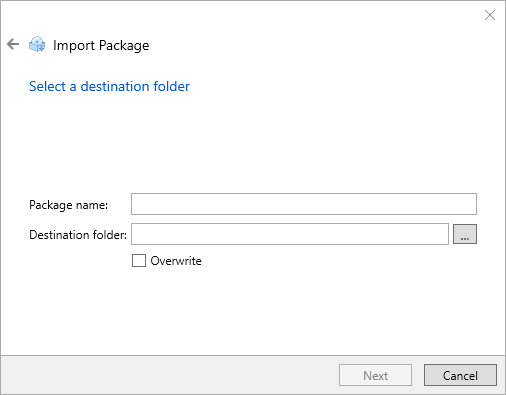
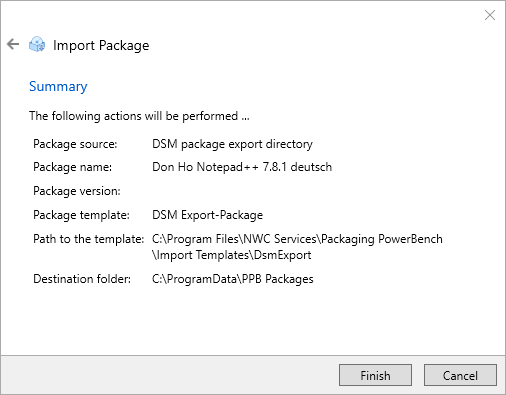
- On the next wizard page, the name of the DSM package is read from the "_ExpInfo.xml" and suggested as the package name for the PPB package. The dialog also suggests a location for the package. If the directory already exists, you can specify that you still want to import into this directory by checking the "Overwrite" checkbox. The existing content will then be deleted before the export..
- On the following wizard page you will see a summary of the settings made. Start the import with "Finish".
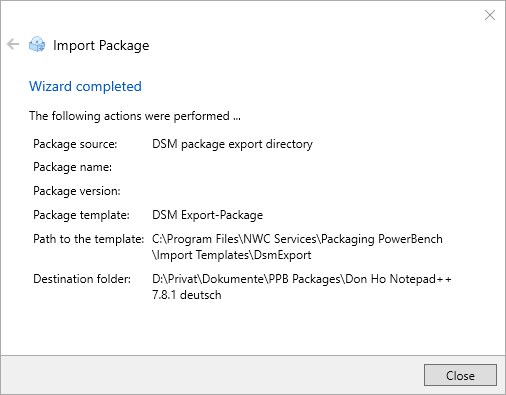
- After the import you will see the performed actions and you can close the wizard with "Close".
Option 2 - Online import from a DSM environment:
If you want to import a package directly from a DSM environment, proceed as follows:
- Start the package import as described above.
- On the "Import DSM-Package" page of the wizard, select the "DSM Online package" option as the package source.
You can use the "..." button next to "DSM package folder" to display the package selection dialog, which shows you the Global Software Library of your connected DSM environment. Now select the package to be imported from this dialog and confirm with OK.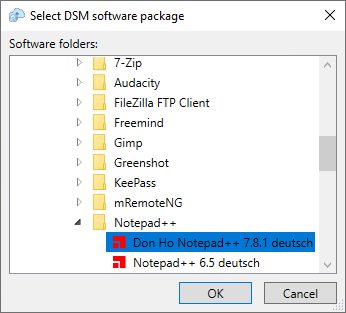
The UNC path to the selected package is entered in the "DSM package directory" field. Confirm your selection with "Next" - The remaining steps correspond to the import of a previously exported DSM package described above, so they will not be repeated here. Complete the import as required.
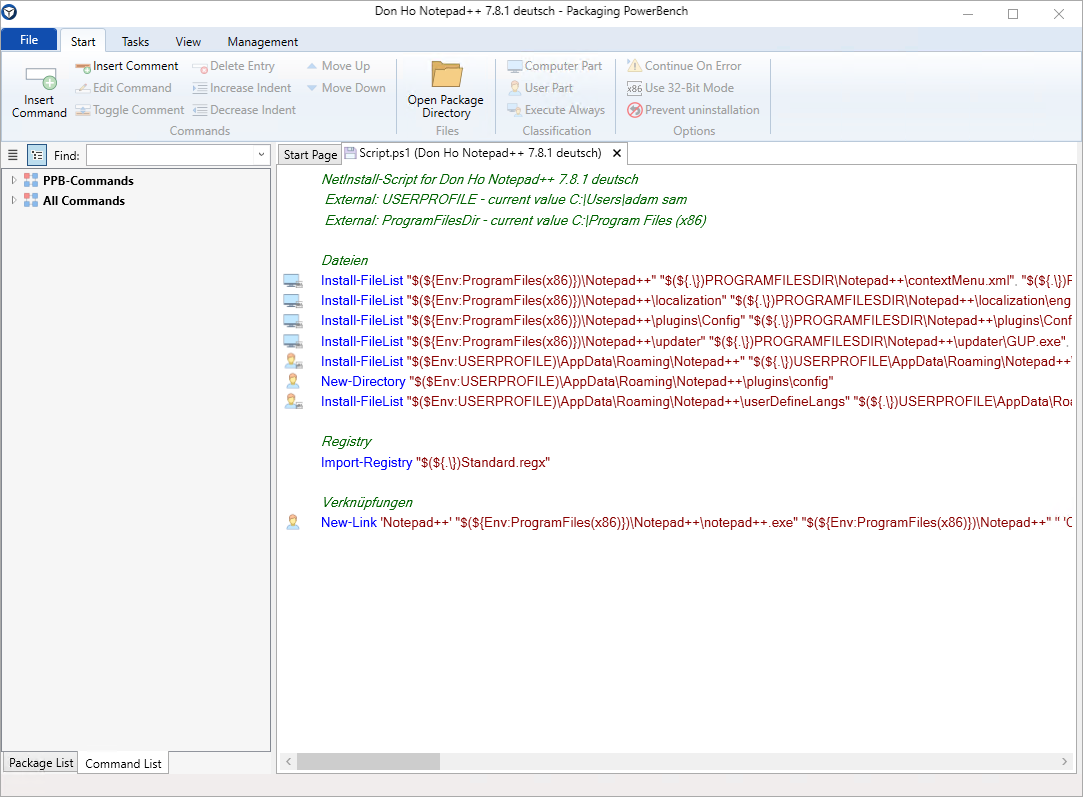
The script is now analyzed and an attempt is made to convert as many commands as possible into the corresponding PowerShell commands. A typical package created by NetInstall-Spy looks like this after import and conversion:
If you have imported a DSM Package, you may notice some comments beginning with "[Note]:" that speak of arguments that are reversed, unsupported, or added. These comments are not errors, but are intended to inform you that options were set in the original script that were changed or needed to be changed during the conversion, and also briefly tell you the reason for the change. You can multi-select the comments and delete them if they are no longer relevant to you.
Typical comments are:
|
Comment |
The option /TS is not supported and was converted to /TW |
|
Description |
In DSM, the /TS option stands for the command classification "Command to be executed per service (computer-related)". Because the PPB only distinguishes between the computer part and the user part, such commands are changed to the Computer-related command classification. |
|
Severity |
Warning |
|
Action |
Please check if the converted command works as expected. |
|
Comment |
Command '<Name of the eScript command>' is undefined. |
|
Description |
This DSM eScript command cannot (yet) be translated in PowerShell. Please see the note below. |
|
Severity |
Error |
|
Action |
You must implement the action that the original command performed. |
|
Comment |
The following variables are undefined |
|
Description |
Variables were found in the script that could not be converted. |
|
Severity |
Error |
|
Action |
You must initialize these variables, which might have been internal DSM variables or used without declaration, in the PowerShell script for the script to work. |
|
Comment |
DSM-Account is unsupported - LocalSystem-Account is assumed instead. |
|
Description |
When converting the RunAs / RunAsEx command, the "Use DSM account" option used in the DSM package was automatically converted to "LocalSystem". |
|
Severity |
Note |
|
Action |
Test the converted package and make sure that it also works under this account. |
|
Note: If an eScript command cannot be translated because the corresponding PackageDeployment counterpart has not yet been implemented, the note "[Note]: Command '<Name of the eScript command>' is undefined" is logged. You must then try to change the logic of the script or map the missing command using PowerShell onboard tools. In any case, please also contact us so that we can support you. |