Preparation of your Intune tenant
Preparation of your Intune tenant
To be able to communicate with Microsoft Intune via an external application such as the Packaging PowerBench, you must define an access point for the application, which you can then later address from within the application. This section describes the steps required to set up such an access point.
- First, log in with an administrative account on your Azure portal at https://portal.azure.com and open the overview page of your Azure Active Directory. At this point, already make a note of the primary domain name from your client information.
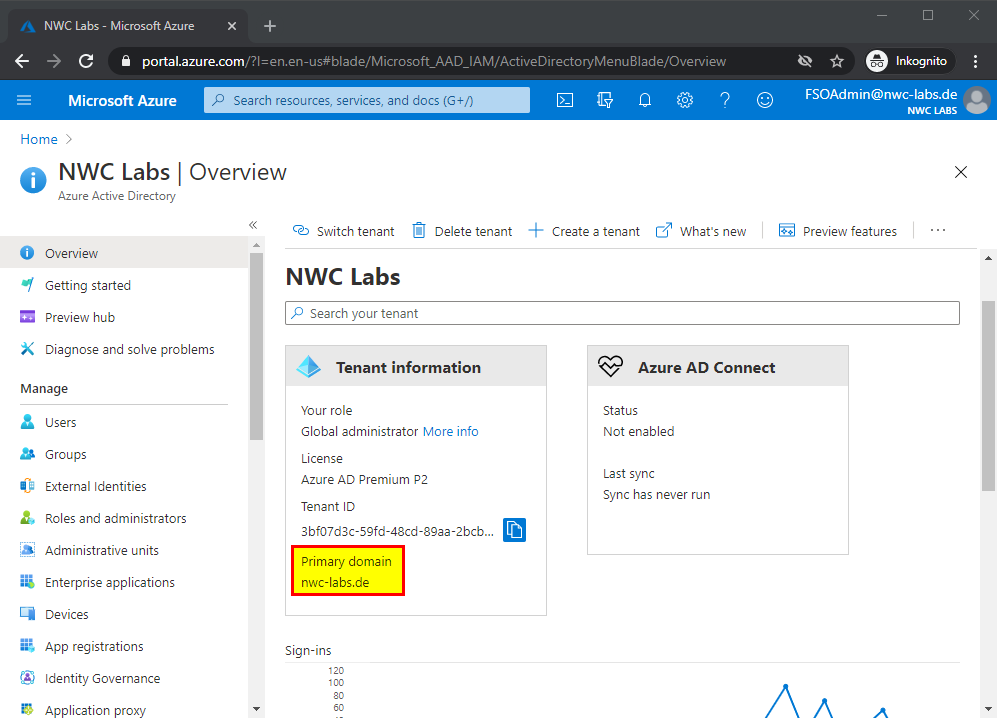
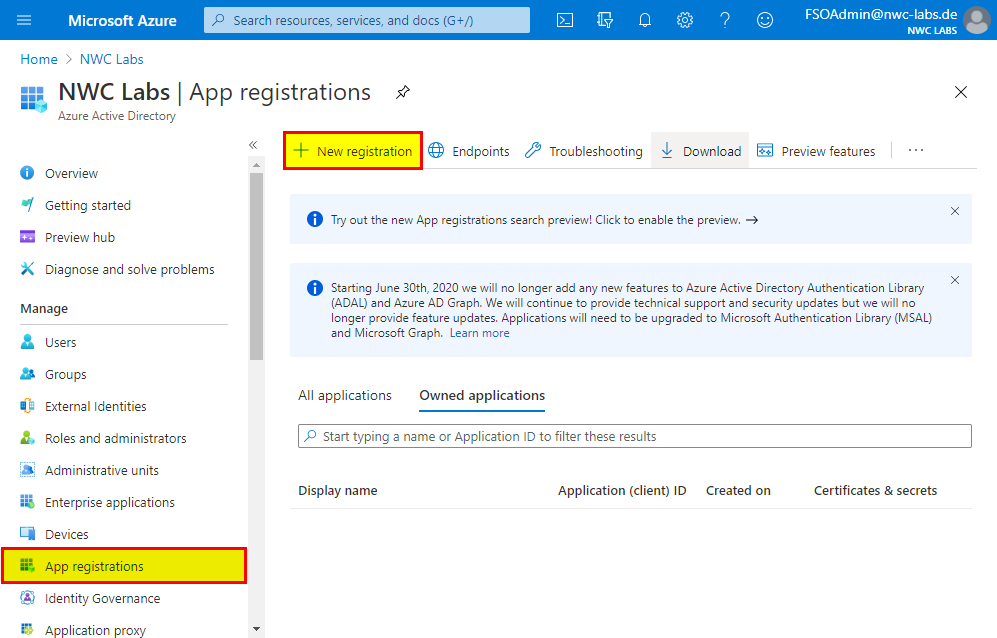
- Then select "App registrations" in the navigation area on the left side and click "New registration" afterwards.
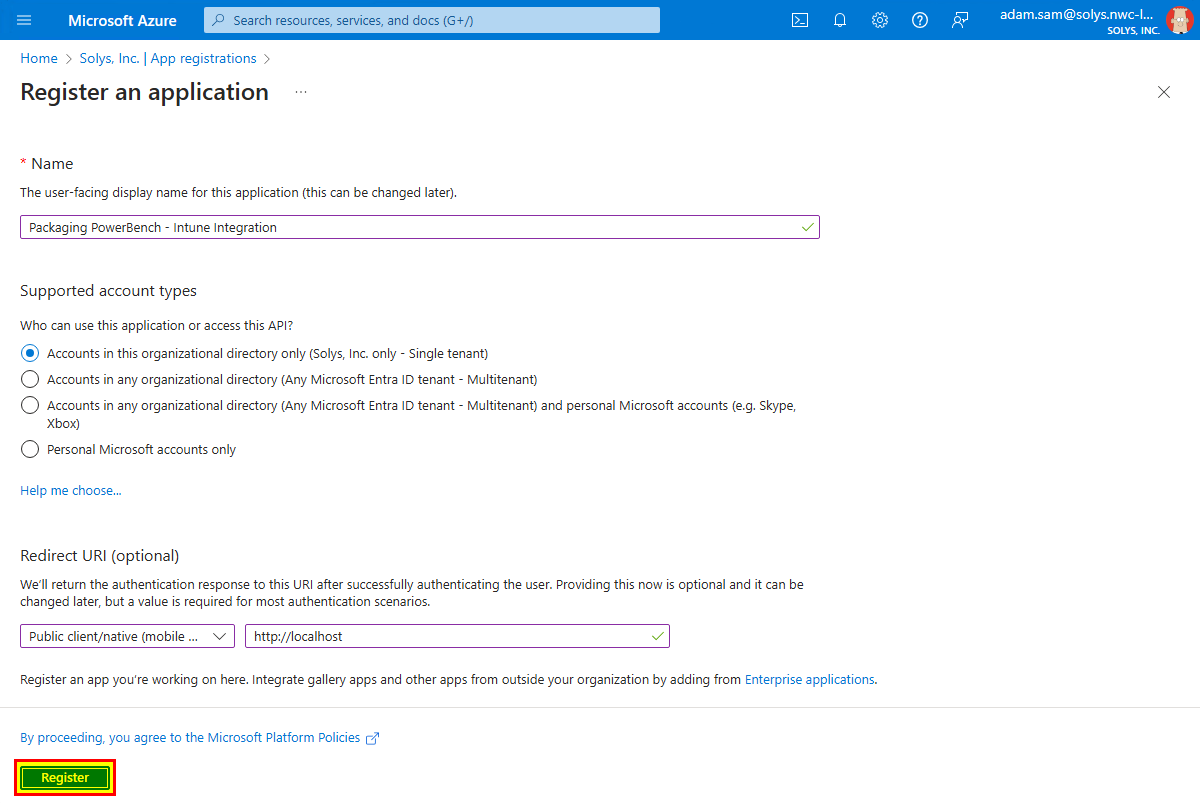
- Give the App registration a descriptive name and select which account types you want to use and what Rredirect URI you want to use. In this example, we will leave the settings for the account types at the default value "Accounts in this organizational directory only". For the Redirect URI, select the option "Public client/native (mobile and desktop)" and enter "http://localhost" as the value. Then click on "Register".
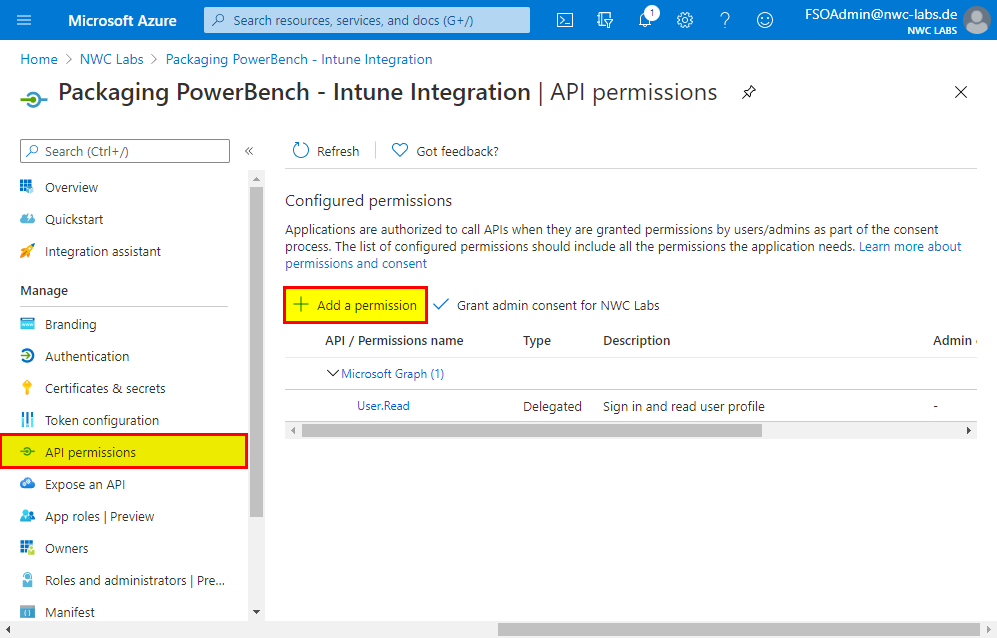
- Now switch to the "API permissions" of the registered application and assign the required permissions for Intune App Management. To do this, click on "Add a permission".
- If you want to use the "Application" authentication mode for the Packaging PowerBench, click on the large "Microsoft Graph" button on the next page and then on "Application permissions". If you do not yet know which authentication mode you will use, it is recommended that you set up both the application permissions and the delegated permissions (see below).
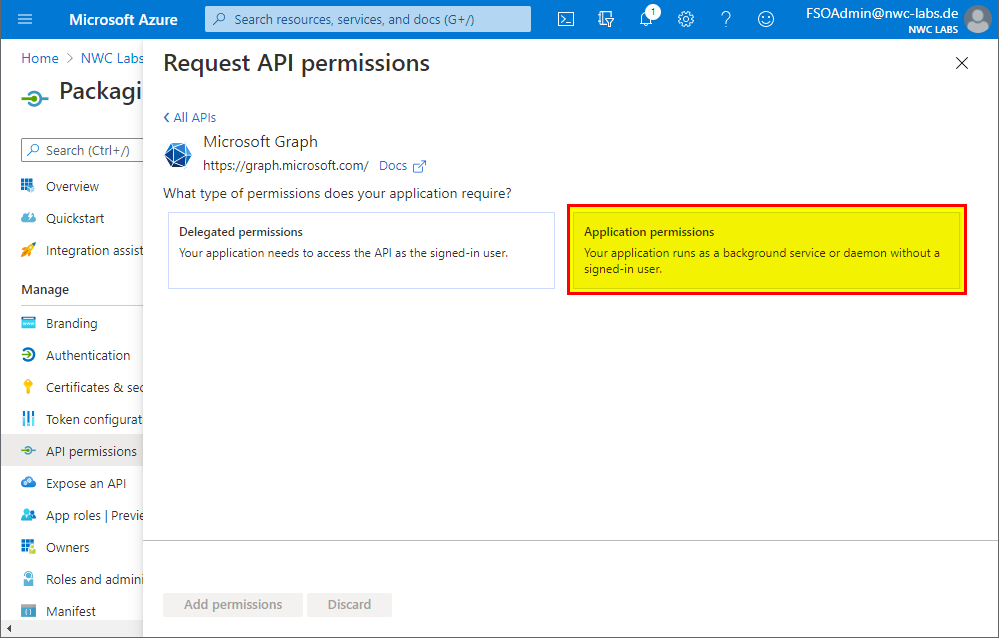
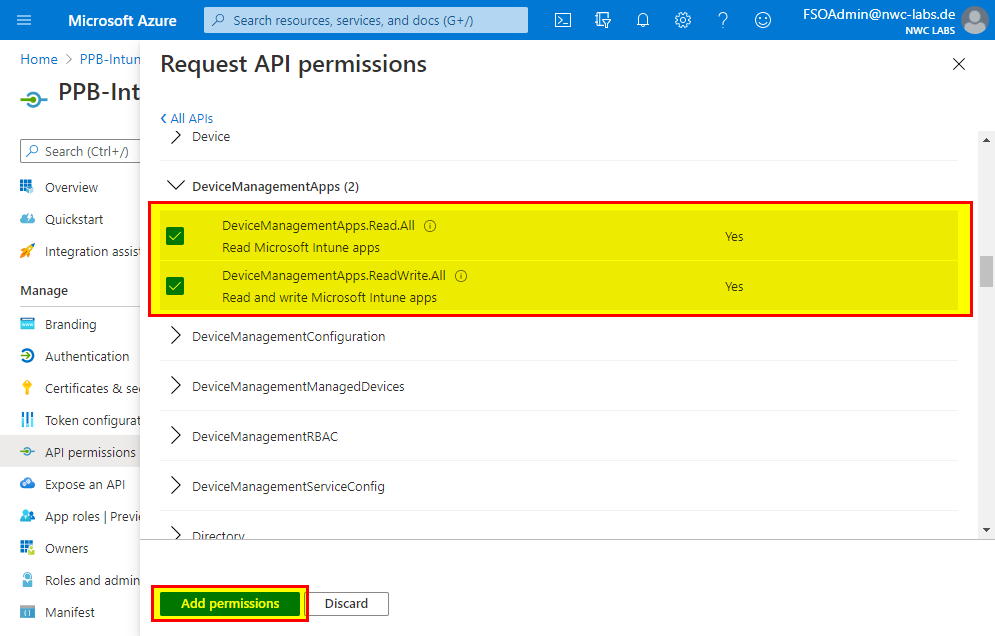
- Now mark the following permissions by checking the corresponding checkbox:
- DeviceManagementApps
- DeviceManagementApps.Read.All
- DeviceManagementApps.ReadWrite.All
and then select "Add permissions".
- If you want to authenticate as a user to Intune from the Packaging PowerBench, you must add delegated permissions. Click on "Add permissions" again, then the "Microsoft Graph" button and this time on "Delegated permissions".
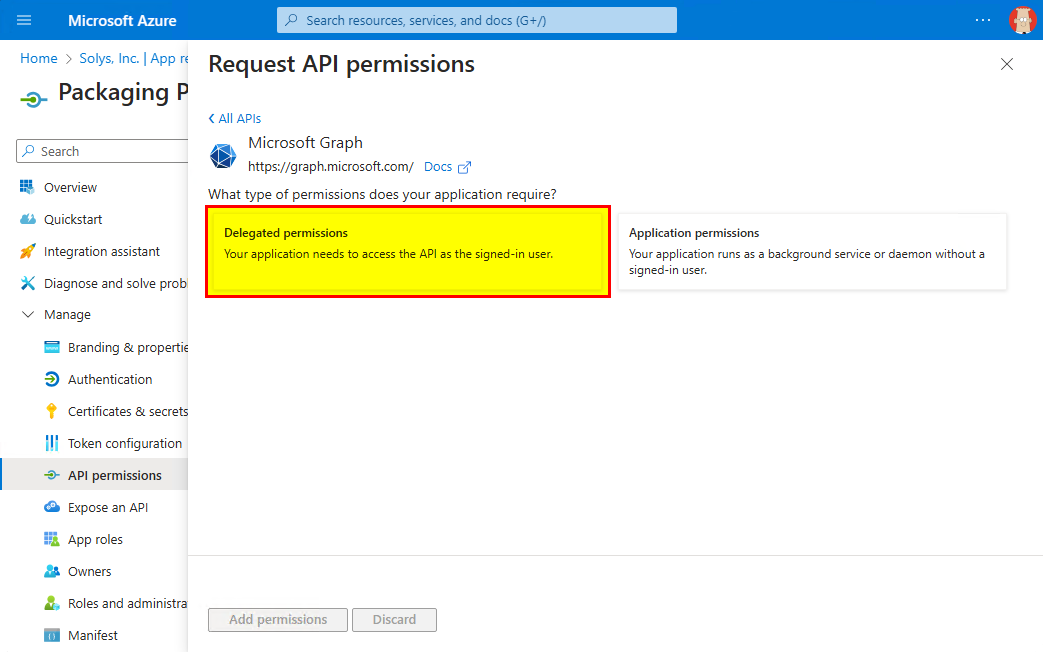
- Mark again the following permissions by checking the corresponding checkbox:
- DeviceManagementApps
- DeviceManagementApps.Read.All
- DeviceManagementApps.ReadWrite.All
and then select "Add permissions".
- In the following screen, as an Azure administrator, you must agree that users of your tenant who use the registered application have the required permissions. To do this, click "Grant admin consent for <your tenant name>". Confirm the following popup with "Yes".
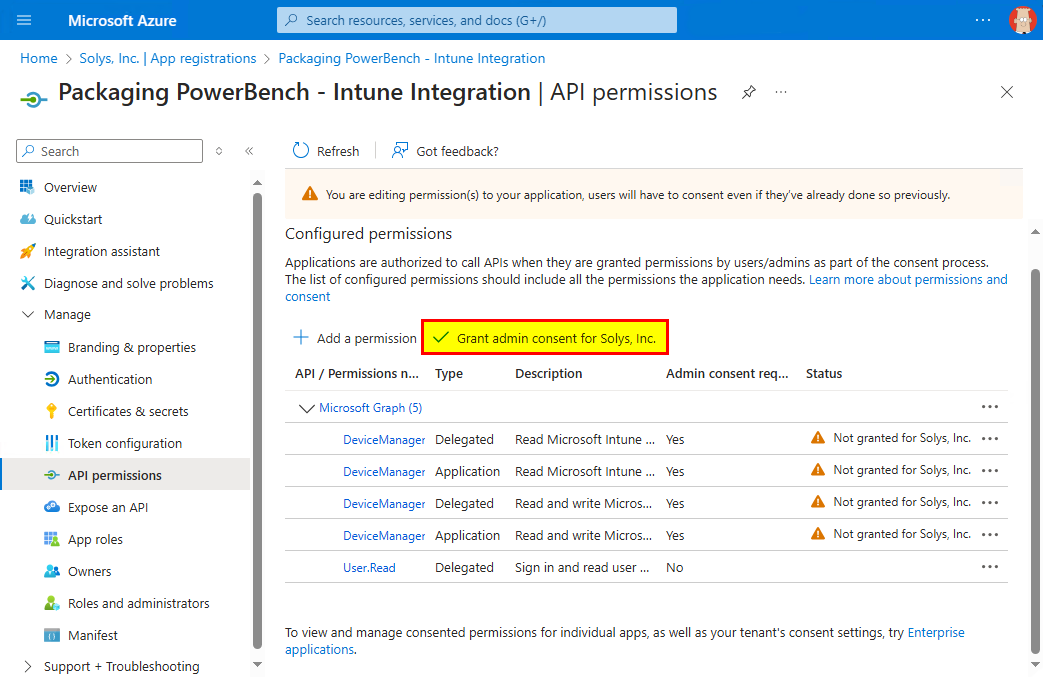
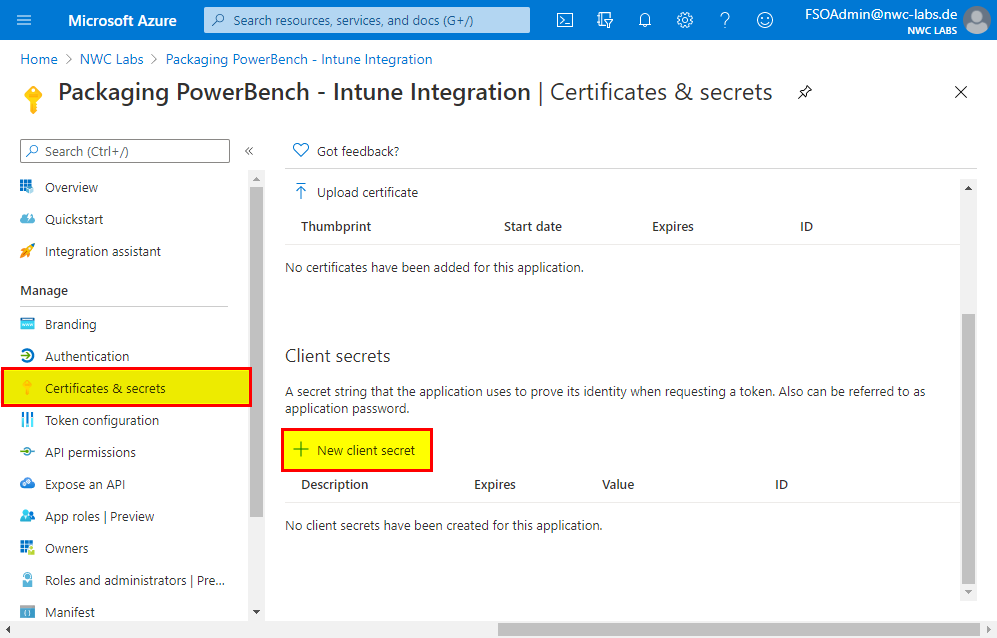
- If you want to use the "Application" authentication mode, switch to the "Certificates & secrets" area and create a new secret client key. This is the password for accessing the registered application interface. If you are authenticating as a user or via a certificate, this step is not necessary.
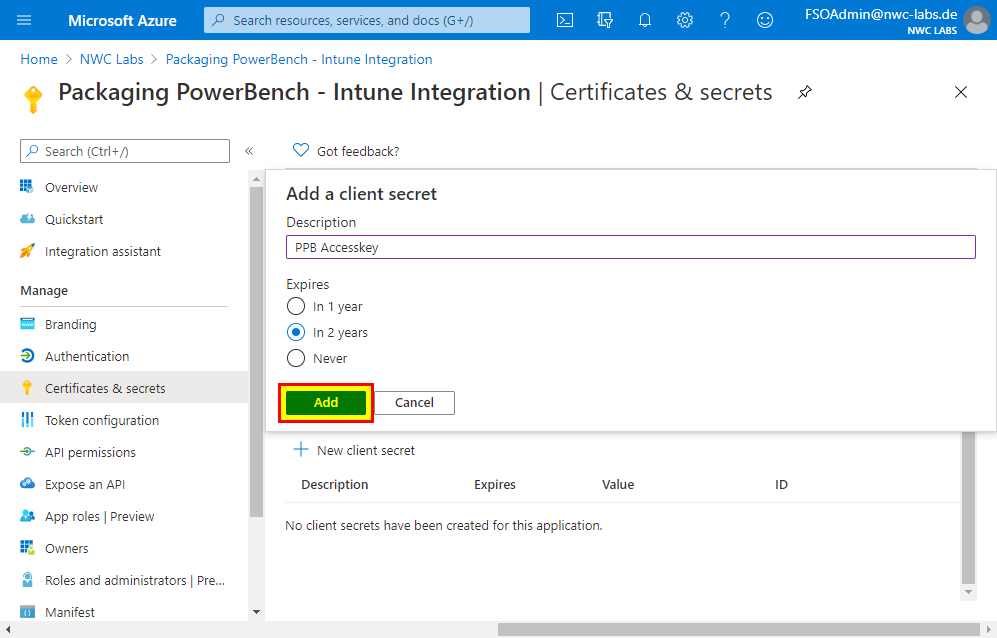
- Again, assign a descriptive name for the secret and select the validity period according to your requirements or internal specifications. Then click on "Add".
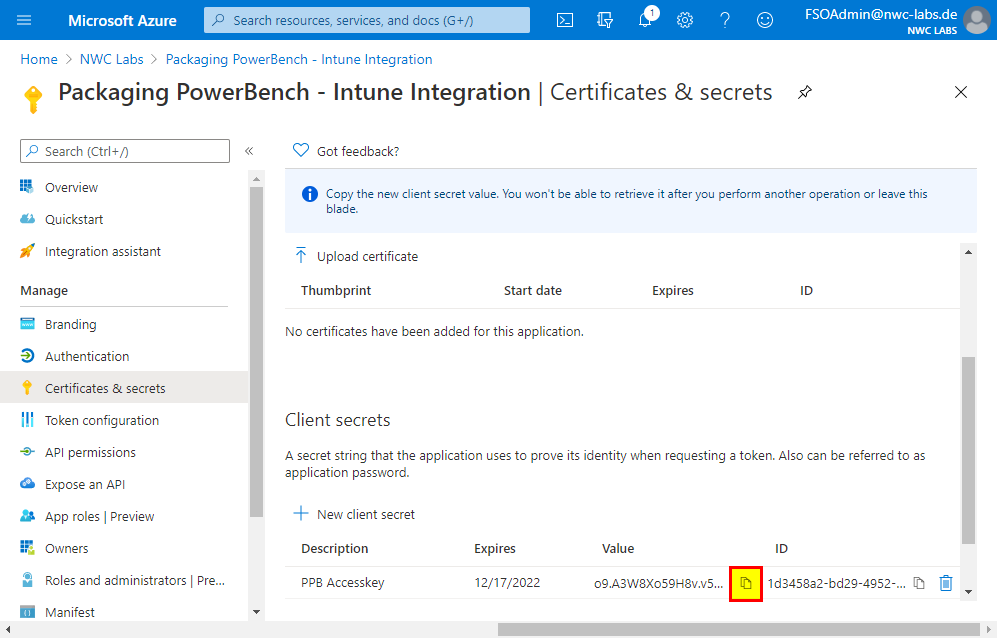
- Now copy the generated secret key to the clipboard using the button marked in the screenshot and save it in a safe place, such as a password safe.
|
Note: If you leave the page without having copied the secret, you will not be able to access this key afterwards. You would then have to create another key. |
- Finally, go to the overview page of the registered app and make a note of the "Application ID" of the registered app.
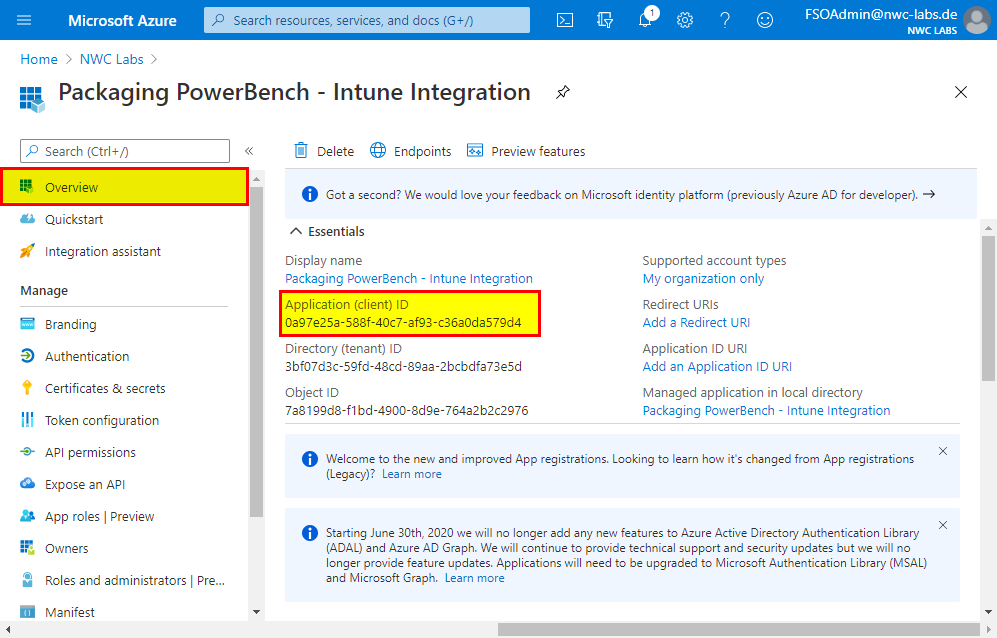
You should now have the following information together, which you will need again in the next step - configuring Intune integration in the Packaging PowerBench:
- Domain name of your tenant
- Application ID of the registered application
- Optional a secret client key for accessing the app if you are authenticating via the app